In configureWoo online course, WooCommerce adds a ‘WordPress customizer’ section. It is named ‘WooCommerce’ indeed. Through which, you can manage store notice, product images, checkout fields, etc. In this article, we will see how to add WordPress Customizer setting in WooCommerce.
Also, what if you wish to combine your own settings? This is how you can operate through more options or type input values. Further, the question arises how to make it doable on your WooCommerce website? So, Let’s see how you can do it.
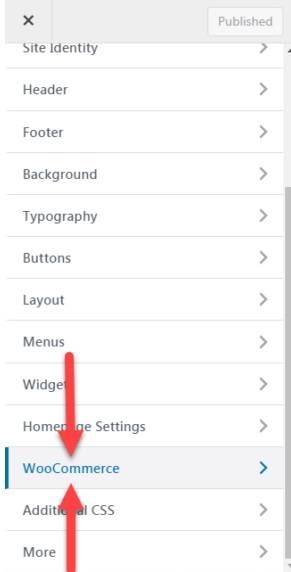
PHP Snippet: Add WordPress Customizer setting in WooCommerce
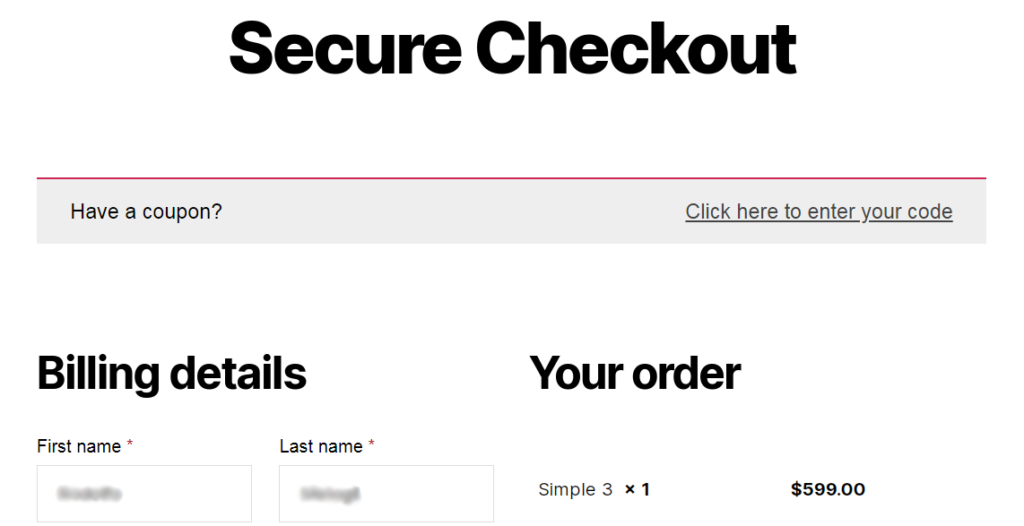
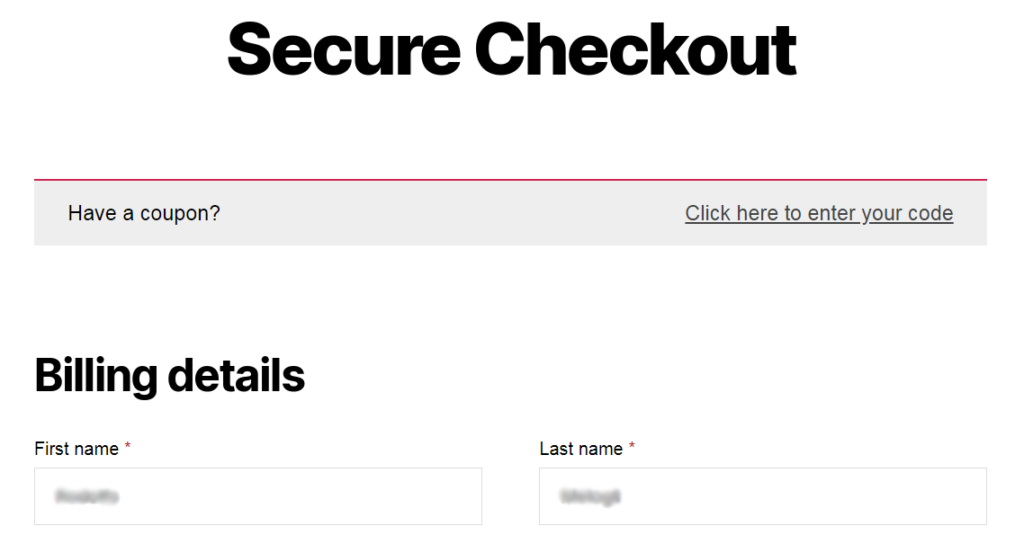
In the following example, you will add a checkbox to the WooCommerce>checkout section. This section is located in WP customizer settings. This checkbox is useful to switch between 2 column checkout layout & 1 column checkout layout. The 2 column checkout layout is same as default for WooCommerce themes like Storefront 2021.
The snippet consists of three parts:
- add_setting(): It generates the option
- add_control(): It controls & manages the option. This function informs WP about checkbox. Also, it tells in which section should it appear. In our example, it will appear at woocommerce_checkout.
- Conditional CSS: This WP function activates only when you enable the option. For instance, it will appear only when the checkbox is checked.
This is how you add WordPress Customizer in WooCommerce.
add_action( 'customize_register', 'phpsof_woocommerce_wordpress_customizer_css_option' );

function phpsof_woocommerce_wordpress_customizer_css_option( $wp_customize ) {
   $wp_customize->add_setting( 'woocommerce_checkout_switch_col_layout', array(
      'default' => 'no',
      'type' => 'option',
      'capability' => 'manage_woocommerce',
      'sanitize_callback' => 'wc_bool_to_string',
      'sanitize_js_callback' => 'wc_string_to_bool',
   ));
   $wp_customize->add_control( 'woocommerce_checkout_switch_col_layout', array(
      'label' => 'Switch layout',
      'description' => 'Optionally switch to a 1-column checkout on desktops',
      'section' => 'woocommerce_checkout',
      'settings' => 'woocommerce_checkout_switch_col_layout',
      'type' => 'checkbox',
   ));
}

add_action( 'wp_head', 'phpsof_switch_checkout_cols_css' );

function phpsof_switch_checkout_cols_css() {
   if ( true === wc_string_to_bool( get_option( 'woocommerce_checkout_switch_col_layout', 'yes' ) ) ) {
   ?>
   <style type="text/css">
      .woocommerce-checkout form .col2-set, .woocommerce-checkout form #order_review, .woocommerce-checkout form #order_review_heading {
         width: 100%;
         float: none;
         clear: none;
         padding-left: 0;
         padding-right: 0;
      }
   </style>
   <?php
   }
}
Before & After applying Add WordPress Customizer function:
Where do you add this snippet?
So, this is how you activate this snippet named add WordPress Customizer setting in WooCommerce. Also, it is easier to activate this function with this code. So, to apply this code, just add this PHP snippet at your child theme function.php file’s bottom. It should be placed before “?>”, if you have it there. Apart from this, CSS goes in your child theme style.css file.
Is this snippet still valid?
So, this way, you can learn about WooCommerce add WordPress Customizer setting. I have applied this code on the Storefront theme and WordPress friendly hosting PHP 7.3. Let me know if everything works as expected. Share it further if you find this snippet useful for you and it had saved your time.
Also Read, How to Add Custom Field to Product Variations?
How to enable WooCommerce Display Shipping Date at Product Page?
Important links: WooCommerce – https://woocommerce.com/
WordPress – https://wordpress.org/